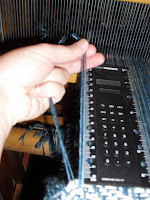
 First, I cut four warp threads, using a small ruler as a guide.
 Next, I divided the threads up into two bundles.
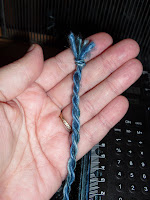
 Each bundle got twisted in the same direction, until they just started to kink up.
Then, I tied both bundles together at the end.

Ready? Just let go. The threads will twist back on themselves, to make a stable and attractive fringe.

Today, I also took time to photograph a batch of yarn I spun a bit ago. This is how it started out, way back when. The fiber is a nice soft wool mill end roving from the Brown Sheep company.

I took the yarn to the Griffin Dye Retreat with me, and dunked it a couple of times in the natural indigo dye pot. Have you ever dyed with indigo? It is amazing. You just dip your yarn in the pot, and pull it out. It comes out a yellow-green color. As the dye hits the oxygen in the air, a chemical reaction happens and the yarn turns it's final blue right before your eyes. Magic! Here are the skeins, hung up to dry along the side of my tent.
 I measured it out today. I have 1660 yards of single ply yarn, coming in at 15 wraps per inch. I spun it to be a weaving yarn, appropriate for a historical recreation piece. Most wool fabrics in the Middle Ages and Renaissance were woven with single ply yarn. I was pretty dubious when I first heard that. I figured hand spun single ply would break, or kink up. But I tried it and, lo and behold, centuries of weavers actually knew what they were talking about. It works beautifully. I'm thinking this yarn would be a great base for an A&S weaving entry, especially with the natural indigo dye for color.
It is going in the Etsy shop for now. If it doesn't sell by the time I finish up my next weaving project (probably going to be those White Scarves), I'm likely to take it off the market and use it myself.
Great post. I love seeing the processes behind the materials we use. :)
ReplyDeleteThanks! I think I have as much fun making the materials as I do making a final project. :)
ReplyDeleteTerrific tutorial! Well documented and tremendous photographs!
ReplyDeleteThat's really cool! I loved seeing your process!
ReplyDeletethanks so much for posting that! i really liked it!
ReplyDeleteGreat post!!
ReplyDeleteThanks, everyone! I love the feed back. Nice to see you all here. :)
ReplyDelete