
I got my new-to-me standing inkle loom all warped up for card weaving. This was my first time warping this loom, which is always a bit of a problem solving process. But once I got the bugs worked out, it went very well. For the tablets, I'm using the coasters that I altered the other night. (Go back two entries for that tutorial.)
 I went through my stash of weaving yarn, and picked out several cones of 8/2 unmercerized cotton. This was leftover from several towel projects. The blues and greens are not the same color obviously, but when I squinted at them I could see that they were just about the same value. That means they will blend visually, while giving just a bit more interest to the finished product. I needed 4 cones of dark, and 2 cones of light.
 I clamped the loom on top of a cone holder that my husband made for me several years back. This made it easier to keep the yarns from tangling up.
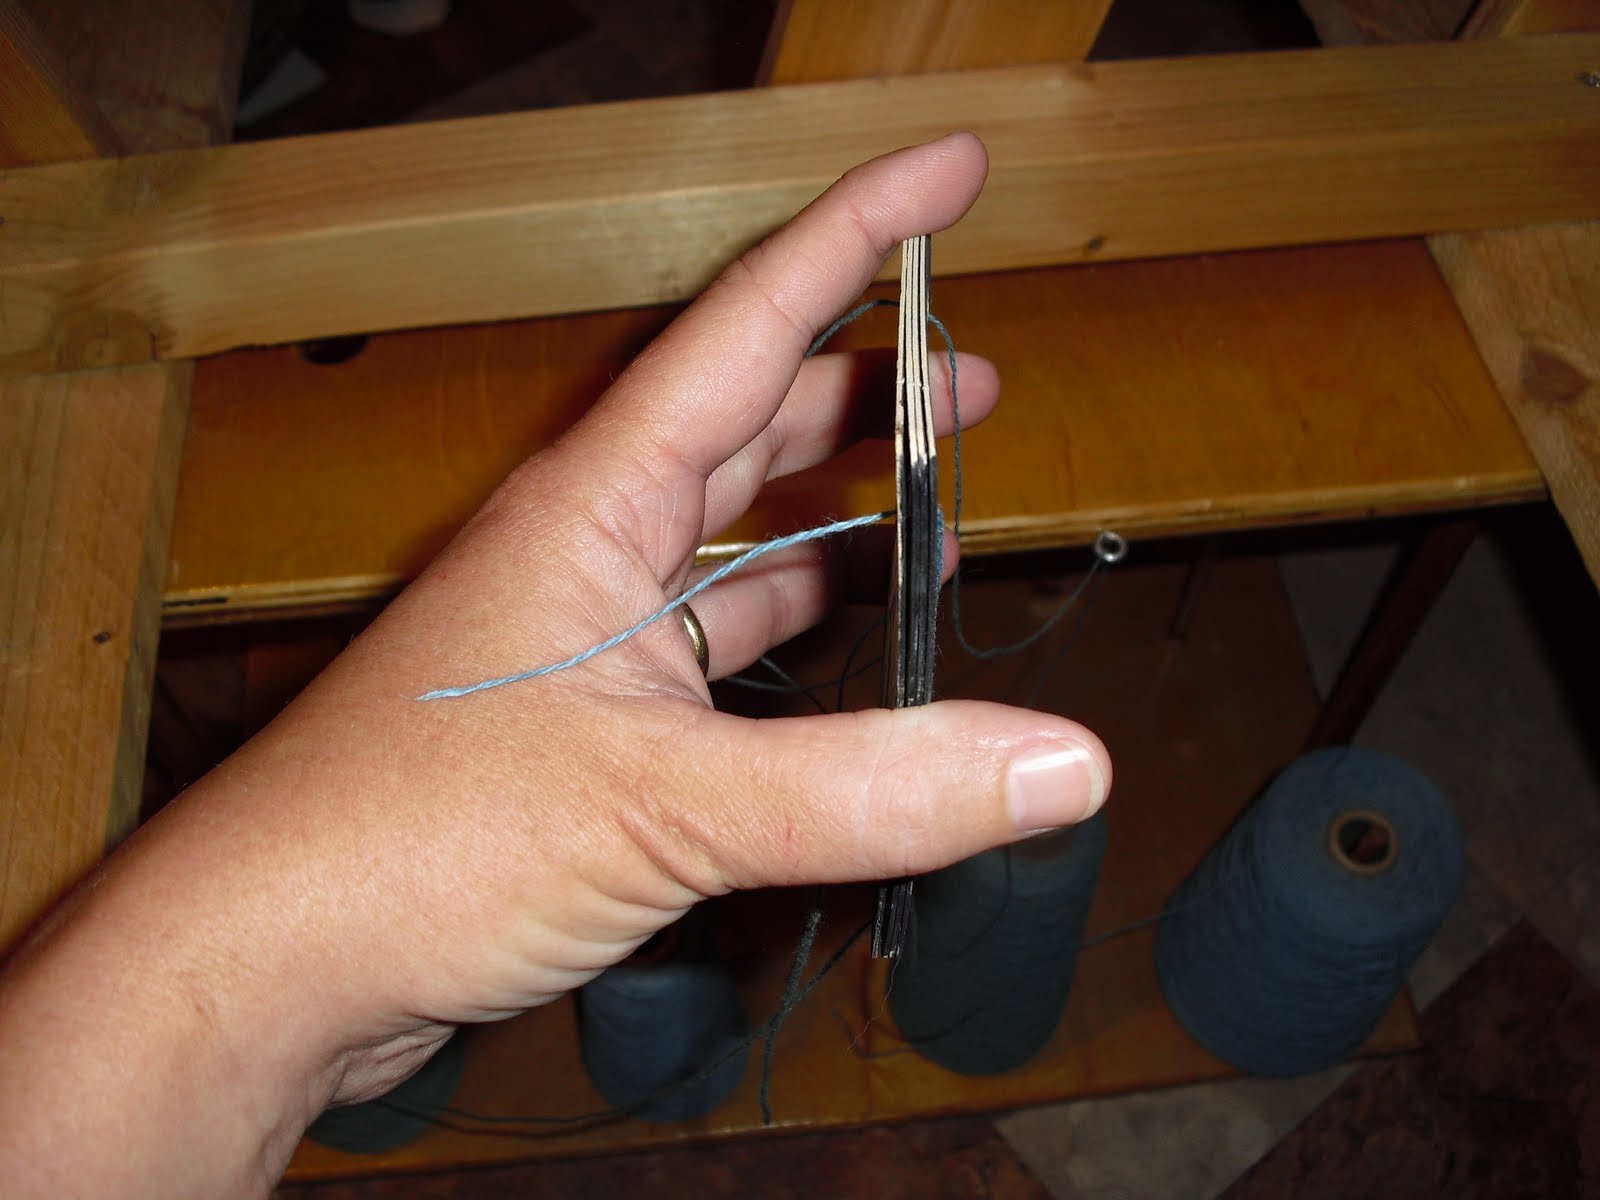 I picked out 4 cards for the border of my strap, and lined them all up the same way. Then I threaded the yarn from each cone through a separate hole, all coming from the same direction.
 I tied all 4 threads together, and then tied them on to the first peg on my loom
 I dropped off one card from the top of my stack there by the first peg. Then I used a binder clip to clip together my stack of working cards
 Then I wound the threads around my pegs, holding the working stack of cards in one hand. I had to use one hand for the camera here, so it isn't quite right. I usually held the cards in my right hand, and guided the threads around their path with my left.
 When I got back to the beginning, I wound the threads around the top peg several times to free up both hands. Then I took one card out of the binder clip from the working stack, and added it to the stationary pack. I used a second binder clip to keep the cards in the stationary pack from wandering around. Then I unwound the threads from the peg, and went around the path again.
 I kept doing that, until I had gone around the pegs again after dropping the last card off. Then I cut the threads down by the cones. I went back to where I had originally tied on to the first peg, and carefully cut that knot. Those two ends got tied together, so there was a continuous warp.
 Now, I threaded a stack of 16 cards for the middle pattern part of the strap. The A and B holes got dark colored threads. The C and D holes got light colored threads.
 It was a little harder just to poke the thread through the whole stack of cards, so I used a tapestry needle to help me out. The pattern cards were warped the same way as already shown. Then I did a second stack of 16 cards, again in the pattern colors. (The binder clips are only so big, so I didn't do the whole stack of 32 at once.) After that, I did another 4 cards of all dark colors, for the other border. The pattern is 4 cards all dark, 32 cards dark and light, 4 cards all dark.
 After the loom was all warped up, I started weaving the header. The cards separate the threads, creating an opening (or 'shed) for the weaving process. Rotating the cards brings different threads to the top, creating a different shed.
 With all the cards lined up identically, I made a great stripe pattern.
 However, what I wanted was a wavy water pattern. I rotated each pattern card separately, until the light and dark threads matched the pattern seen here. This is from Candace Crockett's book "Card Weaving'. (I highly recommend this book for beginners!)
 After I had the cards in order, I started weaving...and found that I had the pattern on the bottom of the band instead of on the top. I reversed the notching pattern. This gave me smooth diagonal lines. By rotating the pack forward 4 times, and then reversing to rotate backward 4 times, I got my wavy line pattern.
I'm all set ready to weave. Warping and weaving the header took me a bit over an hour and a half.
Following your blog! Saw you on Etsy forms! Great stuff!
ReplyDeleteMy shop: www.kmcgiveron.etsy.com
Blog: www.kathleenmcgiveron.com
Facebook: www.facebook.com/kmcgiveronart
Twitter: www.twitter.com/kmcgiveron
www.kmcgiveron-art.com
Thanks for stopping by, Kathleen. I visited your shop--you do nummy work! Particularly liked the bowl with the birds.
ReplyDeleteThank you! I decided to try tablet weaving on my inkle loom. Been looking at a ideas for warping. Using the clips to keep the cards in place makes it so much simpler. I am ready to try.
ReplyDeleteHi do the threads get tangled up, and need to be combed out, on the inkle loom like they do when weaving off of a loom? Thanks. :)
ReplyDelete