Welcome to the crafty side of my life. Here I'll be musing about projects I'm working on, and the creative process around them. Oh, and there will be occasional bouts of cooking, photography, and poetry, too.
Monday, April 30, 2012
CSM socks and hat from Serenity yarn
I made a pair of socks today on my antique Creelman Brothers sock knitting machine. This pair is already spoken for. Don't you love the way the color pools and oozes around the sock? This is made from Serenity sock weight yarn from the Deborah Norville collection, from JoAnne's. It is the 'Aquamarine' colorway, and is a very lovely and soft mix of superwash Merino wool, bamboo, and nylon. I hope the recipient has fun with them!
The cool part of today is down in the lower right hand corner of the above picture. I figured out how to use the leftover sock yarn to make baby caps, also on the sock knitting machine. I like the yarns I've been working with so much that I've kept all the bits leftover after making socks. But I haven't really figured out what to do with them yet. I had tentative visions of weaving projects...but baby caps are just about the right size to use up the leftovers. And the yarn is warm, and soft against the skin. I'm thinking that quite a few newborn baby caps may be in my future! If I get going, I'll make some for friends/family, some for the Etsy shop, and maybe some for the local hospitals come winter time.
Friday, April 27, 2012
Ear wraps and project planning for ruanas
I've been having fun making more of the ear wraps. I made this one for my daughter, and she loves it. It is just like the one the other day, but instead of making a spiral on both top and bottom, I squiggled the bottom wire down to where she wore her post earrings, and made a loop there for the post to go through. That seems to anchor the ear wrap nicely in place. She says it is not that comfortable to sleep in, but otherwise she forgets she has it on. If I think of it, I'll make a tutorial on how to make these, but there are several good ones scattered around the net already.
In other news, I've been pondering where I want to take my art work next. What really inspires me are pictures of fantastic wearable art pieces. I think perhaps I should head in that direction. I love the nuno felted scarves, and I might try those. I also really enjoy wearing the ruana that I wove awhile ago, and loved the warp painted shawls I did. I'm thinking I ought to combine those two projects, and do a sample warp painted ruana and see how that goes. To that end, I bought some 3/2 white cotton. That should be a nice weight to wear, and should weave up relatively quickly. I bought enough for one ruana, just to try out. Well, I tried to buy it. It is currently on back order.
I'm thinking that two over sized hand painted silk scarves could also make an awesome vest/ruana if I sewed them together halfway up their length for a back seam. I might or might not want to also sew the sides together, to make arm holes and to keep the silk from flying around too much. So I also ordered 4 22"x72" habotai silk scarves from Dharma Trading Company tonight. If I paint two scarves with the same color scheme, it ought to work out well. I think I can see it in my head, but I need to experiment. If it turns out like I envision, I'll want a couple for myself, and then several for the shop to try out and see if they would go. It should be an elegant and whimsical dash of color to wear, particularly as summer wear. And the silk ruanas would be quicker (and so less expensive) to produce than the warmer and heavier hand woven ones.
The ideas are bubbling around my brain. Time to make some pretty things!
In other news, I've been pondering where I want to take my art work next. What really inspires me are pictures of fantastic wearable art pieces. I think perhaps I should head in that direction. I love the nuno felted scarves, and I might try those. I also really enjoy wearing the ruana that I wove awhile ago, and loved the warp painted shawls I did. I'm thinking I ought to combine those two projects, and do a sample warp painted ruana and see how that goes. To that end, I bought some 3/2 white cotton. That should be a nice weight to wear, and should weave up relatively quickly. I bought enough for one ruana, just to try out. Well, I tried to buy it. It is currently on back order.
I'm thinking that two over sized hand painted silk scarves could also make an awesome vest/ruana if I sewed them together halfway up their length for a back seam. I might or might not want to also sew the sides together, to make arm holes and to keep the silk from flying around too much. So I also ordered 4 22"x72" habotai silk scarves from Dharma Trading Company tonight. If I paint two scarves with the same color scheme, it ought to work out well. I think I can see it in my head, but I need to experiment. If it turns out like I envision, I'll want a couple for myself, and then several for the shop to try out and see if they would go. It should be an elegant and whimsical dash of color to wear, particularly as summer wear. And the silk ruanas would be quicker (and so less expensive) to produce than the warmer and heavier hand woven ones.
The ideas are bubbling around my brain. Time to make some pretty things!
Friday, April 13, 2012
Back to work
Now that Estrella is done, and I've mostly recovered from the event, it is time to get myself back into gear in the studio. So for the past few days, I've been cranking out socks on my antique sock knitting machine.
I've got three pairs of women's socks off the machine, and ready for the hand sewing part. I can sew up the toes tomorrow night, when I have company over for game night. That way I can be part of the frivolity, and still have hand work to do.
I also had a 'duh' moment this evening. When I'm making the Viking wire woven necklaces, like these:
I will often end up with several inch scraps of wire left over after making the clasps. It pains me to just throw them away, but what to do with them? Tonight it hit me. I know how to make ear cuffs, stupid! So I whipped out the pliers, and a little experimentation later I remembered the trick and made this cuff.
I currently have it on, and it is very comfortable. I foresee lots of decorative twists of wire in my future. Maybe I'll eventually have a selection of them for sale as impulse buys in my booth at art shows.
Speaking of art shows, a friend of mine is having one in her home this weekend, and invited me to join her selection of hand picked artists. If you are in the Phoenix, AZ area, I'd love to have you stop by and say 'hi'! You can get more information at the FaceBook page for the event, at http://www.facebook.com/events/355899951087466/ . The list of crafters is:
Susan Holt - Fine Art and Jewelry (http://www.etsy.com/people/saholtartist1)
Jennifer Richardson - Tatting
Jana Stobaugh - Fine Leather Crafting
Erika Swanson - Skylanth Sky Dragons (http://www.etsy.com/shop/skydragons)
Kat Bretcher – Brazen Button, Scarves for Lily (http://www.brazenbutton.com/)
Pati Cook - Quilts
and me, Melissa Wold-McCollum - Fiber Arts (http://www.etsy.com/shop/tangibledaydreams)
Should be a fun weekend. Kat asked me if I would bring out my antique sock knitting machine, so I'll be giving a bit of a demo on that as well. I'm looking forward to this!
I've got three pairs of women's socks off the machine, and ready for the hand sewing part. I can sew up the toes tomorrow night, when I have company over for game night. That way I can be part of the frivolity, and still have hand work to do.
I also had a 'duh' moment this evening. When I'm making the Viking wire woven necklaces, like these:
I will often end up with several inch scraps of wire left over after making the clasps. It pains me to just throw them away, but what to do with them? Tonight it hit me. I know how to make ear cuffs, stupid! So I whipped out the pliers, and a little experimentation later I remembered the trick and made this cuff.
I currently have it on, and it is very comfortable. I foresee lots of decorative twists of wire in my future. Maybe I'll eventually have a selection of them for sale as impulse buys in my booth at art shows.
Speaking of art shows, a friend of mine is having one in her home this weekend, and invited me to join her selection of hand picked artists. If you are in the Phoenix, AZ area, I'd love to have you stop by and say 'hi'! You can get more information at the FaceBook page for the event, at http://www.facebook.com/events/355899951087466/ . The list of crafters is:
Susan Holt - Fine Art and Jewelry (http://www.etsy.com/people/saholtartist1)
Jennifer Richardson - Tatting
Jana Stobaugh - Fine Leather Crafting
Erika Swanson - Skylanth Sky Dragons (http://www.etsy.com/shop/skydragons)
Kat Bretcher – Brazen Button, Scarves for Lily (http://www.brazenbutton.com/)
Pati Cook - Quilts
and me, Melissa Wold-McCollum - Fiber Arts (http://www.etsy.com/shop/tangibledaydreams)
Should be a fun weekend. Kat asked me if I would bring out my antique sock knitting machine, so I'll be giving a bit of a demo on that as well. I'm looking forward to this!
Friday, March 23, 2012
Contrasting gores in cotehardies
I am involved in a historical recreation group, and as such I ended up looking at making a cotehardie. Cotehardies were the height of fashion in the 1300's, and are usually what people think of as a Medieval princess' dress. To make a nice big flowing skirt, you add triangles of fabric called 'gores'. Now, one of the things I have been told is that making the gores a contrasting color to the rest of the dress just wasn't historically accurate. "Wrong, wrong, wrong!" is what I've read.
But...it is pretty! And I like it. And I'm stubborn, so I kept looking for documentation that perhaps sometime folks did this contrasting gores thing.
This evening I was wandering through the book, "Fashion in the Age of the Black Prince" by Newton, and stumbled across the following pictures:
And that last one reminded me of a line drawing from the book "Dress Accessories", from the Museum of London.
I'm thinking I'll make my cotehardie with contrasting gores, and feel pretty safe in the knowledge that it is perhaps plausible after all.
Edit: Also Figure 70 on this page: http://publishing.cdlib.org/ucpressebooks/view?docId=ft8k4008jd&chunk.id=d0e3511&toc.id=d0e3511&brand=ucpress
Edit again: I tracked down the picture that the last line drawing was based on, and this is why you don't trust line drawings. Take a look: http://vieuxchamps.com/persona/enlarged/wg/wpic3.php . The figure on the right does not have contrasting gores after all. The artist who did the line drawing was, I think, not looking closely. This image does, however, show the variety of patterned fabrics that could be used.
But...it is pretty! And I like it. And I'm stubborn, so I kept looking for documentation that perhaps sometime folks did this contrasting gores thing.
This evening I was wandering through the book, "Fashion in the Age of the Black Prince" by Newton, and stumbled across the following pictures:
And that last one reminded me of a line drawing from the book "Dress Accessories", from the Museum of London.
I'm thinking I'll make my cotehardie with contrasting gores, and feel pretty safe in the knowledge that it is perhaps plausible after all.
Edit: Also Figure 70 on this page: http://publishing.cdlib.org/ucpressebooks/view?docId=ft8k4008jd&chunk.id=d0e3511&toc.id=d0e3511&brand=ucpress
Edit again: I tracked down the picture that the last line drawing was based on, and this is why you don't trust line drawings. Take a look: http://vieuxchamps.com/persona/enlarged/wg/wpic3.php . The figure on the right does not have contrasting gores after all. The artist who did the line drawing was, I think, not looking closely. This image does, however, show the variety of patterned fabrics that could be used.
Friday, March 9, 2012
Viking Wire Weaving: Changing size and flexibility through the draw plate
I just finished up weaving a Viking wire woven necklace. (For instructions, take a look at this post: http://tangibledaydreams.blogspot.com/2010/03/tutorial-viking-wire-weaving.html ) I'm using 'Artistic Wire' in a couple of different colors this time around. I weave the necklace about half as long as I want the finished product to be, and then draw it through successively smaller holes in a draw plate. This shrinks down the diameter of the weave, increases the length, and turns a rigid tube of wire into a supple chain.
So, this necklace was just around 12" when I was done with the weaving portion.
I pulled it through smaller and smaller holes in the draw plate, all the way down to the smallest.
The final chain ended up being 23" long.
It always amazes me how flexible the chain gets!
I still need to add a hook and eye clasp to this one. And I'm also going to take sandpaper to the chain, to knock the colored coating off of the outside of the chain. That will leave the color on the inside, but expose the copper core of the wire on the outside, making a beautiful multi-tone necklace. (It means I don't have to worry about the color wearing off in spots over time and wear and ruining the look of the necklace, because I will have already knocked down the color in a controlled and thorough manner. It makes the eventual wearing off of color a feature, not a bug.)
So, this necklace was just around 12" when I was done with the weaving portion.
I pulled it through smaller and smaller holes in the draw plate, all the way down to the smallest.
The final chain ended up being 23" long.
It always amazes me how flexible the chain gets!
I still need to add a hook and eye clasp to this one. And I'm also going to take sandpaper to the chain, to knock the colored coating off of the outside of the chain. That will leave the color on the inside, but expose the copper core of the wire on the outside, making a beautiful multi-tone necklace. (It means I don't have to worry about the color wearing off in spots over time and wear and ruining the look of the necklace, because I will have already knocked down the color in a controlled and thorough manner. It makes the eventual wearing off of color a feature, not a bug.)
Thursday, March 1, 2012
Not a dog rug. Really. (But it should be, right?)
Awhile before Christmas, I made a sheet of flat felt in order to make my sweetie a hat. I got around to starting on that last night, and put my felt, pattern, and scissors down on the ground to prep for cutting out the pieces. I turned around to get my camera (tutorial to come in a few days)...and when I turned back my pup had staked his claim to this absolutely perfectly sized wool felt puppy rug.
I wasn't actually going to cut into his rug...was I Mom? ....Mom?? I wasn't so horribly unkind and unfair to dogs, was I???
Yup. I was. The hat is cut out and sewn, and I need to check it for size before I put the finishing touches on it. My poor abused puppy will have to make do with curling up in my lap instead. (He's currently trying to convince me to quit typing, because it is making his arm pillow move too much.)
Sunday, February 26, 2012
Orange Vinegar
It is getting close to Estrella time for me (estrellawar.org), which means I'm starting to look at doing some food prep. One of the things I make every year is a drink called sekanjabin. I did a post on that one a few years ago, here: http://tangibledaydreams.blogspot.com/2010/01/sekanjabin-and-dried-fruit.html . It is a syrup made of vinegar, honey, mint, and water. The syrup lasts unrefrigerated for quite some time. To drink, you mix one part syrup with about 8 parts water, and serve it either chilled or hot.
Well, it is also orange harvest time here, and I was squeezing some oranges for juice today. I got to thinking...and put a cup of white vinegar aside with some orange peels and rosemary in it. I'll let it sit for a week or two, strain out the solids, and then put it in a spray bottle about half and half with water. I use vinegar water for cleaning, and I think the orange oils (cleaning) and rosemary (disinfectant) will add a nice punch to the home made cleaner. It should smell better, too.
And then as I was putting that on the pantry shelf to do its thing, I got to thinking about the upcoming batch of sekanjabin. And wouldn't it be good if I used orange infused vinegar to make it with? I had to try it. So, here is how I'm making the orange vinegar:
First I went and picked 8 oranges.
I brought them in and gave them a good washing, to get air born whatever off of the skins.
Then I used a potato peeler to take just the orange outer layer of peel off of the orange.
I had a bottle of apple cider vinegar with just over 2 cups left in it, which is what I need for the sekanjabin recipe. I popped the peels right into the bottle.
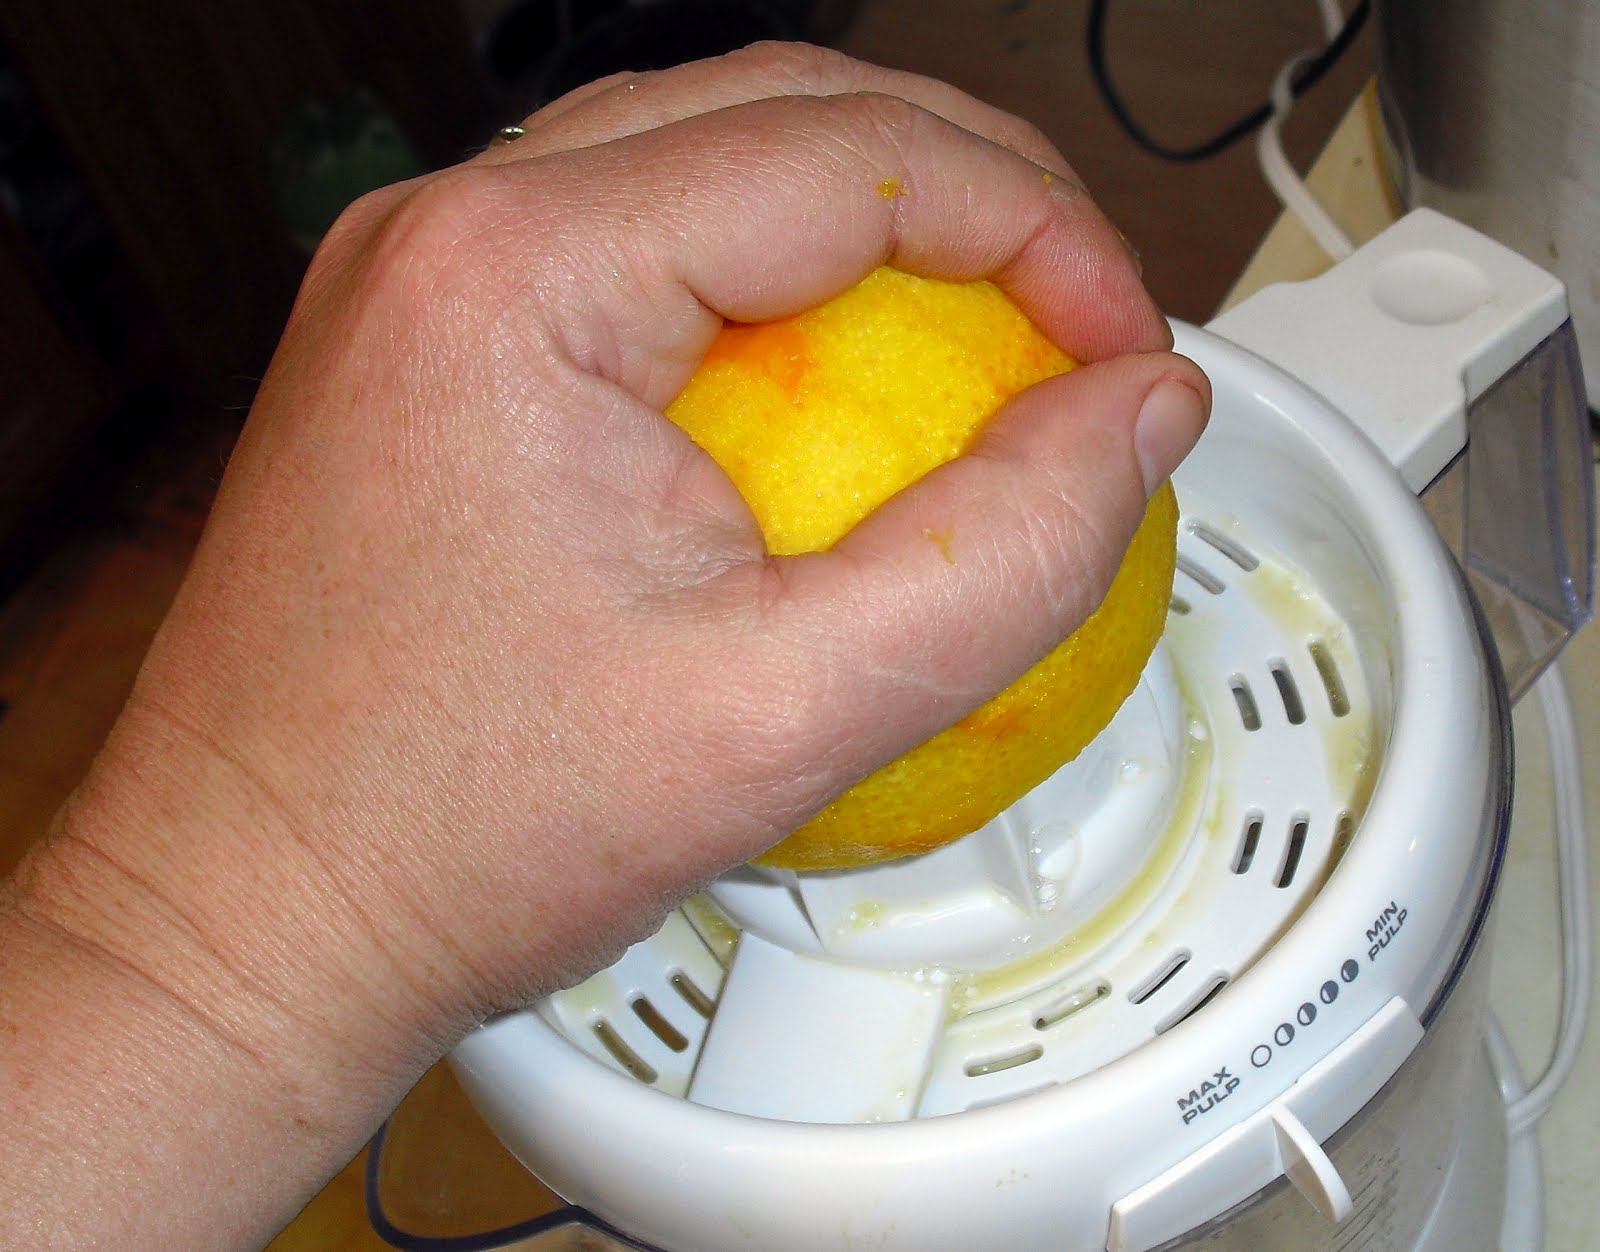
I juiced the oranges, of course. Fresh squeezed is soooo much better than store bought. The oranges were a little more slippery now that the outer zest was off of them. But it was easier to deal with that than to try to cut and juice them first, and then take the peeler to the rind.
8 oranges worth of zest was probably excessive, but I didn't want to waste what I had picked. At this point, I'll leave it a few weeks, and then strain out the solids and see what I'm left with.
To be continued.
Well, it is also orange harvest time here, and I was squeezing some oranges for juice today. I got to thinking...and put a cup of white vinegar aside with some orange peels and rosemary in it. I'll let it sit for a week or two, strain out the solids, and then put it in a spray bottle about half and half with water. I use vinegar water for cleaning, and I think the orange oils (cleaning) and rosemary (disinfectant) will add a nice punch to the home made cleaner. It should smell better, too.
And then as I was putting that on the pantry shelf to do its thing, I got to thinking about the upcoming batch of sekanjabin. And wouldn't it be good if I used orange infused vinegar to make it with? I had to try it. So, here is how I'm making the orange vinegar:
First I went and picked 8 oranges.
I brought them in and gave them a good washing, to get air born whatever off of the skins.
Then I used a potato peeler to take just the orange outer layer of peel off of the orange.
I had a bottle of apple cider vinegar with just over 2 cups left in it, which is what I need for the sekanjabin recipe. I popped the peels right into the bottle.
I juiced the oranges, of course. Fresh squeezed is soooo much better than store bought. The oranges were a little more slippery now that the outer zest was off of them. But it was easier to deal with that than to try to cut and juice them first, and then take the peeler to the rind.
8 oranges worth of zest was probably excessive, but I didn't want to waste what I had picked. At this point, I'll leave it a few weeks, and then strain out the solids and see what I'm left with.
To be continued.
Subscribe to:
Posts (Atom)