Showing posts with label loom. Show all posts

Thursday, February 23, 2012

I found a loom!


Did I need another weaving loom? No, I did not. I have two floor looms already, plus several other little specialized ones. But...I couldn't pass this one up. Really! 8 harness, 40" weaving width. Back beam converts to sectional. Included a horizontal warping mill, a vertical warping mill, a spool rack, a raddle, two reeds, a shuttle, and a sley hook. (That all is weaverese for Dang, this is a cool loom!!!) No, I'm not telling how much I spent, but much less than the several thousands I should have.

Some people bring home stray cats. I bring home stray looms.

Realistically, I should turn around and place this beauty in a good home. I don't have room, and someone else might love it. I'd give a good deal on it. Probably about $600, which is a steal, but I want it to go be used.

But...I think I want to play with it a few times first! Unless someone snaps it up, I think I'll make some dress fabric. Lets see...I've already got some yarn.....

Tuesday, November 29, 2011

Oseberg style tablet weaving loom: first attempt


Here's the first attempt at warping up my new Oseberg style tablet weaving loom. (See my board on Pinterest for pictures of Medieval illuminations of this style of loom: http://pinterest.com/lissamc/medieval-tablet-weaving-equipment/ ) Eric made both it and the cone yarn holder for me, which I used while I was measuring the warp. I love having a wood worker in the house! I'll actually get to weaving tomorrow, once I find a shuttle that isn't already in use. Then we'll see if I did it right or not, and what I need to change for next time.


If the loom looks familiar, that is because it appeared in earlier pictures as my scarf and tie display rack. I ran a clothes line across the top, and clothes pinned my scarfs to the line so they could flutter gently in the breeze. In other words: Yes, I conned my sweetie into building me a reproduction Medieval loom under the pretense of needing a display stand for my business. I'm sneaky that way!

Once I get this figured out, I'll do a how-to blog entry. Right now, I'm seriously winging it. I have absolutely no instructions on this style of loom, so I'm kind of going on my experience in doing back-strap weaving, and crossing that with my inkle loom weaving experience. I think I have it...but we'll see.

It is an adventure!

Sunday, October 10, 2010

Bead Tapestry up on the Mirrix web site

Ok, I've got to brag just a little bit, because I'm so tickled about this.

If you want a small, sturdy tapestry or bead loom, one of the top of the line looms is made by Mirrix. http://www.mirrixlooms.com/

If you go to their website there, and click on 'Galleries' and 'Your Work', a piece I did several years ago is picture #23. The piece is 'Bamboo Dragonfly'.

This is actually a continuation of an exercise I did in color theory class. We had to make an image, and paint it in a couple of different color combinations. One was analogous colors--colors that are next to each other on the color wheel. I used yellow, green, and green-blue.


And one used one of the same colors, but paired it with colors across from it on the color wheel. I used yellow and purple. I liked that one so much, that when I got my Mirrix loom and wanted to try my hand at bead tapestry, I pulled that image out again. I put it behind the warp threads on the loom, to be a pattern/cartoon. Then I matched beads to the picture as I went along. This is how it turned out, and is the image up on the Mirrix page:


Yes, each pixel in the picture is a separate Delica seed bead. The wings are made of the Delica beads that are coated with actual gold, so they shimmer in the light.

Now that I'm reminded of this piece, maybe it is time to pull out the Mirrix again. Hmmmm....what subject should I use this time around?

Friday, August 20, 2010

Tutorial: Warping a standing inkle loom for card weaving


I got my new-to-me standing inkle loom all warped up for card weaving. This was my first time warping this loom, which is always a bit of a problem solving process. But once I got the bugs worked out, it went very well. For the tablets, I'm using the coasters that I altered the other night. (Go back two entries for that tutorial.)


I went through my stash of weaving yarn, and picked out several cones of 8/2 unmercerized cotton. This was leftover from several towel projects. The blues and greens are not the same color obviously, but when I squinted at them I could see that they were just about the same value. That means they will blend visually, while giving just a bit more interest to the finished product. I needed 4 cones of dark, and 2 cones of light.


I clamped the loom on top of a cone holder that my husband made for me several years back. This made it easier to keep the yarns from tangling up.


I picked out 4 cards for the border of my strap, and lined them all up the same way. Then I threaded the yarn from each cone through a separate hole, all coming from the same direction.


I tied all 4 threads together, and then tied them on to the first peg on my loom


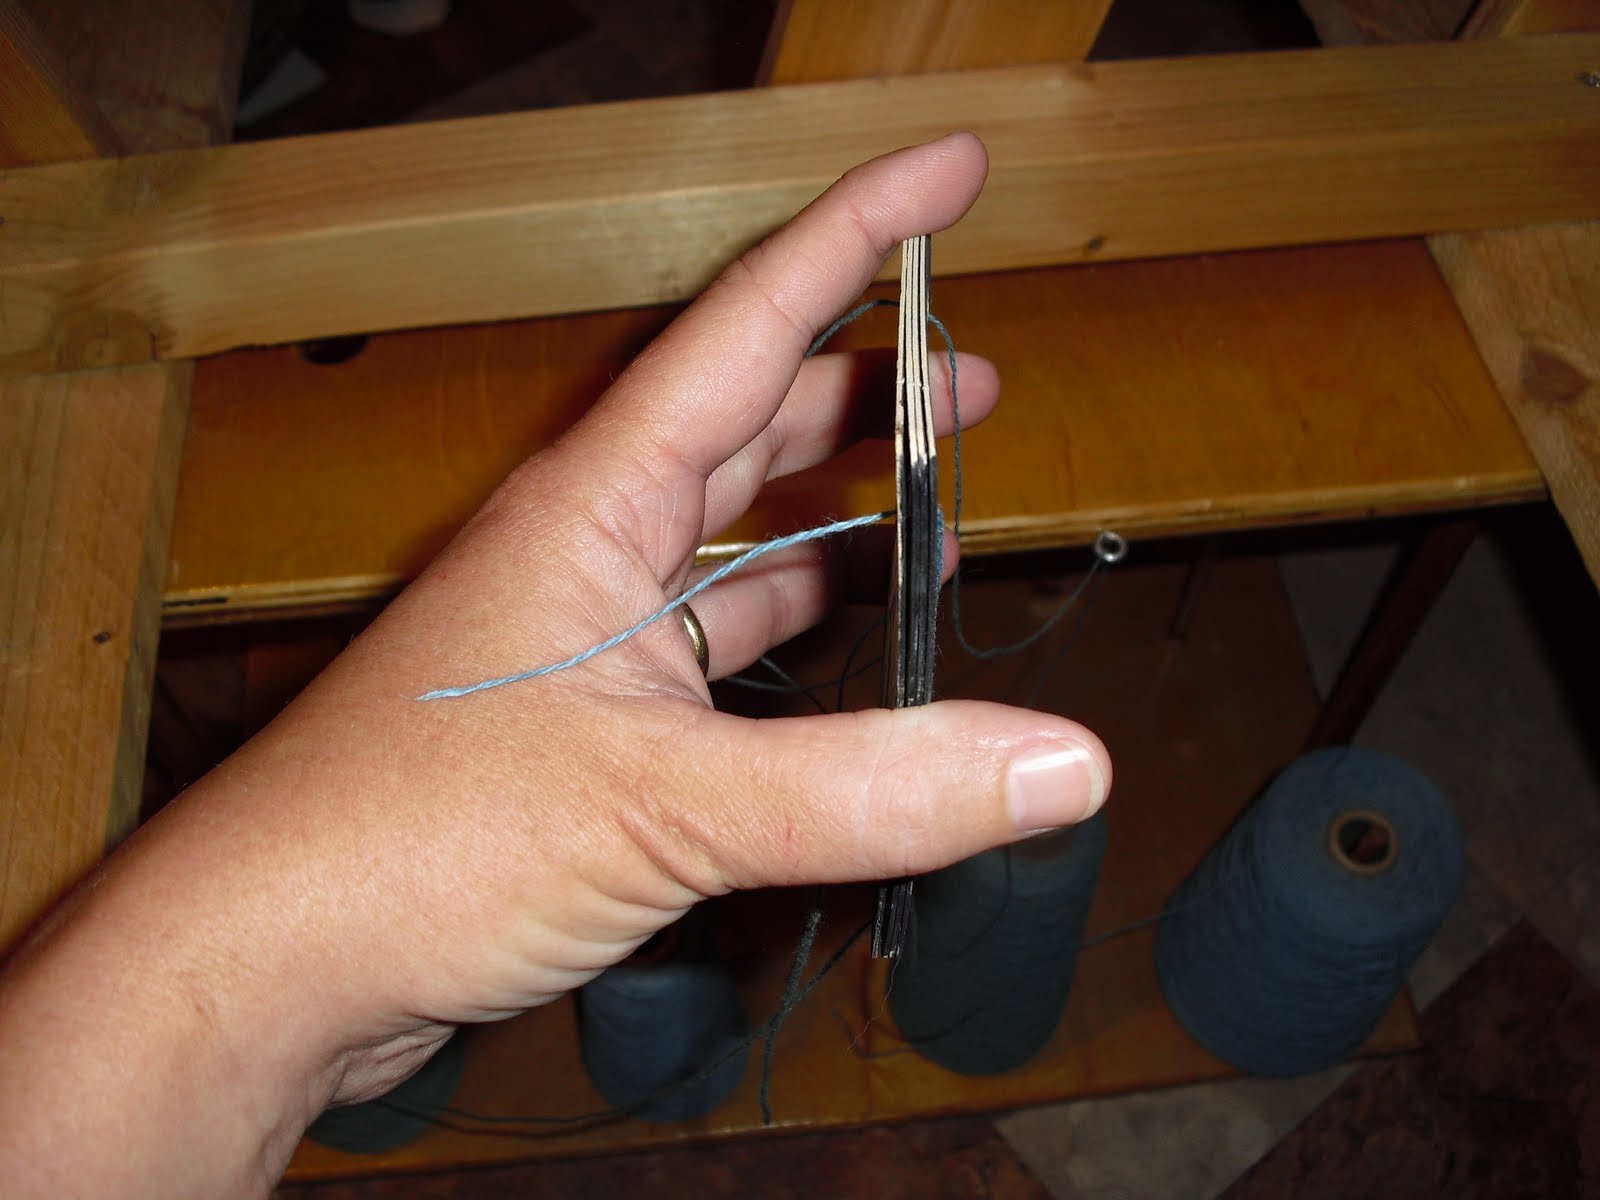
I dropped off one card from the top of my stack there by the first peg. Then I used a binder clip to clip together my stack of working cards


Then I wound the threads around my pegs, holding the working stack of cards in one hand. I had to use one hand for the camera here, so it isn't quite right. I usually held the cards in my right hand, and guided the threads around their path with my left.


When I got back to the beginning, I wound the threads around the top peg several times to free up both hands. Then I took one card out of the binder clip from the working stack, and added it to the stationary pack. I used a second binder clip to keep the cards in the stationary pack from wandering around. Then I unwound the threads from the peg, and went around the path again.


I kept doing that, until I had gone around the pegs again after dropping the last card off. Then I cut the threads down by the cones. I went back to where I had originally tied on to the first peg, and carefully cut that knot. Those two ends got tied together, so there was a continuous warp.


Now, I threaded a stack of 16 cards for the middle pattern part of the strap. The A and B holes got dark colored threads. The C and D holes got light colored threads.


It was a little harder just to poke the thread through the whole stack of cards, so I used a tapestry needle to help me out. The pattern cards were warped the same way as already shown. Then I did a second stack of 16 cards, again in the pattern colors. (The binder clips are only so big, so I didn't do the whole stack of 32 at once.) After that, I did another 4 cards of all dark colors, for the other border. The pattern is 4 cards all dark, 32 cards dark and light, 4 cards all dark.


After the loom was all warped up, I started weaving the header. The cards separate the threads, creating an opening (or 'shed) for the weaving process. Rotating the cards brings different threads to the top, creating a different shed.


With all the cards lined up identically, I made a great stripe pattern.


However, what I wanted was a wavy water pattern. I rotated each pattern card separately, until the light and dark threads matched the pattern seen here. This is from Candace Crockett's book "Card Weaving'. (I highly recommend this book for beginners!)


After I had the cards in order, I started weaving...and found that I had the pattern on the bottom of the band instead of on the top. I reversed the notching pattern. This gave me smooth diagonal lines. By rotating the pack forward 4 times, and then reversing to rotate backward 4 times, I got my wavy line pattern.

I'm all set ready to weave. Warping and weaving the header took me a bit over an hour and a half.

Wednesday, April 21, 2010

This and that

Well, I was going to be weaving on my antique rug loom to test it out over the past several weeks. But I've been up to my eyeballs in life drawing modeling! I love the paycheck, but modeling 4 or 5 days a week really takes it out of me. There has been some awesome artwork coming out of the sessions, though. I've put together a folder with a few snapshots of the student work at Flickr, here: http://www.flickr.com/photos/25078538@N03/sets/72157604578528806/ . I did have a set at Photobucket, but they kept pulling the best drawings down for terms of service violations. They do not like art nudes.

Now, the loom will be leaving my house entirely. I heard back from the Pioneer Living History Museum that is located just north of Phoenix. They're willing to take the loom and add it to their collection. I am actually really tickled about this. I love having the loom, but it really belongs in a museum helping to teach other people. My contact will be there on Thursday, and will get back to me about when I can deliver the loom. In the meanwhile, I need to carefully disassemble it. It is too big to fit through the door as is!

And in other news, I just ordered three Icelandic fleeces off of Ebay, in preparation for an arts competition entry for Estrella next February. One of the three categories for the year is 'weaving', and I'm using it as an opportunity to really push myself. I'd like to make a rectangular Viking cloak from the ground up, as authentically as I can. Hence the Icelandic fleeces. That breed of sheep is supposedly genetically almost unchanged from the sheep the Vikings brought to Iceland 1100 years ago. So, step number one will be to clean and process the fleeces for spinning. I'll be posting more about this project as I go along.

I hope the fleeces get here soon, though. The longer I have to think and plan, the bigger this project gets to be. When I first thought of it, I was going to be content to spin the yarn for the project on my modern treadle spinning wheel with the Woolee Winder. But I have a great wheel that is almost identical to a Medieval wheel. And I have an actual spindle whorl from the Middle Ages...I wonder if I could find a shaft for it and get it working again? And hey, I could dye the yarn too, instead of just using the natural color. I've got a pot of madder that has been growing out front for a couple of years. Hey, if I'm going to all this trouble, maybe I should build a warp-weighted loom, instead of using my modern dobby loom. And....


Somebody stop me before project creep takes over entirely!!

Friday, February 19, 2010

Back from Estrella


I know it has been a bit quiet here recently. For the past while, I've been out at an SCA event, Estrella War. There were about 4000 of us crazy historical recreation people, creating the Middle Ages and Renaissance in the middle of the Arizona desert. Oh man, did I have a marvelous time! Friends and hugs, shopping for one of a kind hand crafted items, coursing my spaniels, cooking over an open fire, cheering on my warriors... I need to wash the pile of laundry, sleep for a week or so, and then I want to go back and do it all again!

Arts wise, it was a great week. I delivered some of my wool socks to their happy new owners. I was able to spend some time demonstrating spinning, which is a lovely way to spend an afternoon.


In fact, on Friday we had bunches and bunches of school kids who came through the event. I spent most of that day discussing how folks in the Middle Ages made clothes, from prepping the raw wool, through spinning, through weaving, and to sewing. Hopefully some of the kids went home appreciating the luxury of having a mall nearby.


Shopping wise, I picked up a new little box loom for making belts and bands.


Isn't it cute? I'm going to try card weaving on it, and maybe some warp faced inkle bands. The inkle loom I've been using is actually out of period for Medieval recreation. This would be much more appropriate. I look forward to trying it out.

I also picked up the book "The Warp Weighted Loom" by Marta Hoffman. I sense a project coming on.

My camera got a work out too, as I took around 100 pictures. Some of those images will be turned into paintings sometime in the future. I have them in an album, here: http://s15.photobucket.com/albums/a366/lissamc/Estrella%2026/

Now, I need to re-group, and figure out what project to tackle next. More socks? Hair sticks? Trying out the box loom? Making new costumes to show off the custom buttons I got? (From Epaul at Grypon Song Gems. Dangerous man! http://www.gemartist.com/)

Hmmm.... Anything but tackling the mountain of laundry. It smells like stale campfire smoke.

(Pictures by me, Jeff Kahler, and Christi Martin.)

Wednesday, October 14, 2009

3d Jigsaw Puzzle


Two years ago, there was a Craigslist ad for a free loom. I'm not one to pass up such a thing, so I emailed the lady and trotted on over. She took me to the back yard, and showed me a rather dilapidated pile of wood on a tarp. Well, it was free. I took it home, and piled it in the garage until I had the time and space to do something about it. It did get put up on shelves, but well...I kind of forgot about it until we were cleaning out the garage over the past week or so. Then I decided it was time to see if I had a pile of kindling, or something that might be salvageable.

The teenagers have abandoned the living room in favor of playing video games in their own rooms, so I had some floor space available. The guys brought the pieces in, and laid them out on the floor, like this:


And then, I got some crescent wrenches, needle nose pliers, and a rubber mallet, and had at it. It took about four hours (and a bit of swearing), but when I was done I had this!


It is indeed a very sturdy two harness loom. The neat thing about it is that there are no foot peddles. The harnesses change when you beat the reed twice, by way of an ingenious set of gears at the bottom of the loom.


Given this clue, and a bit of paint I found reading "Reed", I tracked down some information on this old loom. It is a "Weaver's Friend" loom, made by Reed Loom Company. Reed started making looms in the late 1800's, and continued up until around 1970. Given that some of the nails on the loom have square heads, I'd say this is one of the older looms. http://www.weaversfriend.com/page1/page4/page4.html


My husband is taking the heddles with him to work tomorrow, since he has access to a way to remove rust. I gave the loom a first drink of oil, and will oil it again and rub it down tomorrow when I get home from work. The change in the wood is already apparent though.


It is in surprisingly good shape, given the neglect it has seen over the years. All the pieces seem in good working order. There are a few splits in the wood, but nothing that seems to threaten the structural integrity. All in all, I see no reason why I shouldn't be able to get this old man up and weaving again!


EDIT: Digging further, I found a picture of the same make of loom here: http://www.flickr.com/photos/library_of_congress/2163699690/ . The picture was taken between 1910 and 1915! This baby is about 100 years old.

Wednesday, August 5, 2009

Pictures and Planning

So, you want to see how the 'Falling Leaves' triloom shawl turned out? I took my daughter into the back yard this afternoon, and had her model it for me. (What am I going to do for a model next year, when she's off to college?!) Here are the results:


Today I also took pictures of some of my felt juggling balls. These are kind of cool. I start with a golf ball as the core, then wet felt a seamless wool cover around the ball. The golf ball gives a great weight to the juggling ball, and the felt gives it a nice grippy texture that doesn't slip out of your hands easily. I don't juggle myself, but my friends who do all love these.


Most of today though, was spent moving looms around. I had to disassemble my 8 harness Harrisville loom to get it though my studio door again. We hauled it upstairs to stash it away for the time being. The AVL loom got moved into position in front of my studio window. It is amazing how much more roomy it feels in my studio! The AVL has an appreciably smaller footprint, even though it only has 4" less weaving width. I'm liking this already.

I was going to try out the AVL, and if I liked it the plan was to sell off the Harrisville. But I have two teenagers, and they have watched Mommy weaving for years now. So...it appears that we're yanking out one of the living room sofas tomorrow, and the Harrisville is getting reassembled up in teenager territory. Then there will be some weaving lessons going on! My daughter wants to make her own scarves, among other things. We'll raid the yarn stash, and I'll set them up with a simple warp to start with. As long as we can keep the kitten off the back beam, everything should be fine.

Here comes the next generation of fiber geeks!

Monday, August 3, 2009

New toy new toy new toy...


I am seriously doing the new loom happy dance over here. If you could only see me bouncing around my studio! I know, she doesn't look like much just yet. I need to get her into place, and all set up. But...new loom!!!

Ok, she isn't exactly new. She was made in 1980, and I am her fourth owner. Let me spew some numbers here, then I'll try to translate for the non weavers who are reading. I am the proud owner of an AVL 12 harness 36" dobby folding loom!!!

Translation:

AVL is one of the premier loom makers on the market. That stands for Ahrens and Violette Looms.

12 harness: With a floor loom, the complexity of the pattern you can create is limited by the number of harnesses (or shafts) you are using. The harnesses raise your warp threads. 2 harnesses, and you can only weave variations of plain over/under. My first loom had 4 harnesses. My current has 8. This one having 12 means I can weave some pretty complex fabric.

36": This refers to how wide a fabric I can weave. I don't know if I will actually be able to weave the full 3 feet, and there will be some draw in and shrinkage. But I should be able to make yardage that finishes up at about 30" wide. My current loom has a weaving width of 40", so this is only a few inches narrower. As I rarely use the full width for my projects, it should be enough.

Dobby: With most floor looms, you push floor treadles in order to raise the harnesses. The order that you step on the treadles creates the pattern in your fabric. The trick is remembering where in the pattern you are, especially if you have to stop to answer the phone or chase the kids. With a dobby loom, the job of choosing the shafts is done by a bar and peg system on the side of the loom, that you set ahead of time. There are only two treadles under the loom--one to raise the shafts, and one to advance the dobby bars. This means you can make really complicated patterns, and as long as you pegged the sequence correctly you'll never lose your place.

Folding: When I'm not weaving, the loom is folded up like it is in the picture. It actually takes up less floor space than my current 8 harness Harrisville loom. That will give me more space in my studio, which given the amount of stuff I have crammed in here is a Good Thing.

Do you begin to see why I am so excited? I need to finish up the project I'm currently working on (a triloom shawl in harvest colors--looks lovely!) before I can set up a trial warp. I'm crossing my fingers that I'll like this loom as much as I think I will.

(If I do love it, my Harrisville loom will be up for sale. Anyone near to Phoenix need a loom? New, it would run about $2000. I bought it used for $800. Make me an offer, and we'll talk. )