Welcome to the crafty side of my life. Here I'll be musing about projects I'm working on, and the creative process around them. Oh, and there will be occasional bouts of cooking, photography, and poetry, too.
Showing posts with label card weaving. Show all posts
Tuesday, November 29, 2011
Oseberg style tablet weaving loom: first attempt
Here's the first attempt at warping up my new Oseberg style tablet weaving loom. (See my board on Pinterest for pictures of Medieval illuminations of this style of loom: http://pinterest.com/lissamc/medieval-tablet-weaving-equipment/ ) Eric made both it and the cone yarn holder for me, which I used while I was measuring the warp. I love having a wood worker in the house! I'll actually get to weaving tomorrow, once I find a shuttle that isn't already in use. Then we'll see if I did it right or not, and what I need to change for next time.
If the loom looks familiar, that is because it appeared in earlier pictures as my scarf and tie display rack. I ran a clothes line across the top, and clothes pinned my scarfs to the line so they could flutter gently in the breeze. In other words: Yes, I conned my sweetie into building me a reproduction Medieval loom under the pretense of needing a display stand for my business. I'm sneaky that way!
Once I get this figured out, I'll do a how-to blog entry. Right now, I'm seriously winging it. I have absolutely no instructions on this style of loom, so I'm kind of going on my experience in doing back-strap weaving, and crossing that with my inkle loom weaving experience. I think I have it...but we'll see.
It is an adventure!
Saturday, August 6, 2011
Card woven belt
I've been working on a card woven belt this week. (See the previous post for more pictures of the process.)
So, after I got the weaving done I finished the ends by making twisted fringe. I could do that by hand, but having the proper tool for the job makes the process go much, much faster. I do appreciate my fringe twister!
The belt was 7' long (not counting fringe) after weaving. To wet finish it, I just threw it in the washing machine on hot. It ended up just over 6' long.
I'm pleased with the way this one turned out! This belt will probably end up being a gift. I think the next thing I want to try on the card weaving front will use a similar set up. I'd like to try double weave, to weave words. Now that I've got the hang of card weaving again, it is time to try something new.
So, after I got the weaving done I finished the ends by making twisted fringe. I could do that by hand, but having the proper tool for the job makes the process go much, much faster. I do appreciate my fringe twister!
The belt was 7' long (not counting fringe) after weaving. To wet finish it, I just threw it in the washing machine on hot. It ended up just over 6' long.
I'm pleased with the way this one turned out! This belt will probably end up being a gift. I think the next thing I want to try on the card weaving front will use a similar set up. I'd like to try double weave, to weave words. Now that I've got the hang of card weaving again, it is time to try something new.
Tuesday, August 2, 2011
Triloom weaving with Red Heart Swirl, card weaving, and project planning
I've been weaving in my studio recently, while I'm in between silk painting projects. I've finished one project, started one project, and have another one in the planning stage. Hey, at least one is finished!
This is the finished one: a new shawl on my triangle loom. I'm still hunting for just the perfect yarn to use with this loom. The pegs are kind of far apart, so the yarn needs to be super bulky. The result needs to hold together securely, drape beautifully, and be super soft against bare skin. This attempt used Red Heart Boutique 'Swirl' yarn, which is a mix of polyester, acrylic, wool, and alpaca. It certainly passes the skin test! And it drapes wonderfully. But I think it is a hair too thin to be really structurally sound. I'll need to wear it for awhile to see how it works.
I'm thinking the way to go with the yarn hunt might be to use a double thickness of yarn, instead of trying to find a really thick chunky yarn. That would give me more of an opportunity for color blending, too. The materials would cost more, since I'm using twice as much, which is why I haven't really experimented with this yet. But I think I'll try it out for the next shawl.
After I got the tri-loom put back away, I dug out my inkle loom and got it warped up for card weaving. I clamp it to the cone holder my husband made me, which makes warping much easier. In fact I just leave the loom on there for the weaving part too. It puts it at a nice height when I'm sitting here in my computer chair.
This project will be a belt, inspired by the colors in the heraldry of my local SCA group. I'm doing a card weaving pattern that relies on having two light and two dark threads in each card. I paired the white and the yellow threads for the 'light', and the blue and the purple threads for the 'dark'. They are close enough in value that the eye visually blends them at a distance, and you just see the contrast. I used the red for the border. The store didn't have 4 balls of the same shade of red, so I got two light and two dark. I set it up so the pattern subtly continues on into the border. I think I like that effect!
I'm finding I really prefer card weaving to inkle weaving. The pattern opportunities are very flexible, the resulting fabric is much sturdier, and it is easier to get a clean even selvedge.
The project that is in the planning stage was inspired by this post, by Susan of 'Thrums': http://weeverwoman.blogspot.com/2011/07/between-two-pages.html . She is a most inspiring weaver, and a very gracious lady. She was weaving book marks in very fine linen and cotton. I was particularly caught by the results of the 'tromp as writ' pattern half way down the entry. Is that not spectacular? I realized that my dobby loom had the capability to weave that pattern, and asked if she minded if I took inspiration from her work. Not only did she not mind, she sent me the pattern draft. Did I mention that she is very gracious? Lovely lady.
I can see this pattern slightly larger, made up in yardage to be turned into a Medieval tunic. I wove yardage recently in my hand spun wool yarn, and sewed it up into a super warm winter tunic. But I wanted something for summer wear too, seeing as I live in Arizona. So I went ahead and ordered dark blue and green yarn in 10/2 mercerized cotton from Webs. I'm eagerly waiting for it to get in!
If I have time in and among other (paying) projects, I'd like to get that worked up in the next few months. I've also got some sewing that I want to get done, and there is a possibility of a large scale scarf order in the works.
I do love staying busy here in the studio!
This is the finished one: a new shawl on my triangle loom. I'm still hunting for just the perfect yarn to use with this loom. The pegs are kind of far apart, so the yarn needs to be super bulky. The result needs to hold together securely, drape beautifully, and be super soft against bare skin. This attempt used Red Heart Boutique 'Swirl' yarn, which is a mix of polyester, acrylic, wool, and alpaca. It certainly passes the skin test! And it drapes wonderfully. But I think it is a hair too thin to be really structurally sound. I'll need to wear it for awhile to see how it works.
I'm thinking the way to go with the yarn hunt might be to use a double thickness of yarn, instead of trying to find a really thick chunky yarn. That would give me more of an opportunity for color blending, too. The materials would cost more, since I'm using twice as much, which is why I haven't really experimented with this yet. But I think I'll try it out for the next shawl.
After I got the tri-loom put back away, I dug out my inkle loom and got it warped up for card weaving. I clamp it to the cone holder my husband made me, which makes warping much easier. In fact I just leave the loom on there for the weaving part too. It puts it at a nice height when I'm sitting here in my computer chair.
This project will be a belt, inspired by the colors in the heraldry of my local SCA group. I'm doing a card weaving pattern that relies on having two light and two dark threads in each card. I paired the white and the yellow threads for the 'light', and the blue and the purple threads for the 'dark'. They are close enough in value that the eye visually blends them at a distance, and you just see the contrast. I used the red for the border. The store didn't have 4 balls of the same shade of red, so I got two light and two dark. I set it up so the pattern subtly continues on into the border. I think I like that effect!
I'm finding I really prefer card weaving to inkle weaving. The pattern opportunities are very flexible, the resulting fabric is much sturdier, and it is easier to get a clean even selvedge.
The project that is in the planning stage was inspired by this post, by Susan of 'Thrums': http://weeverwoman.blogspot.com/2011/07/between-two-pages.html . She is a most inspiring weaver, and a very gracious lady. She was weaving book marks in very fine linen and cotton. I was particularly caught by the results of the 'tromp as writ' pattern half way down the entry. Is that not spectacular? I realized that my dobby loom had the capability to weave that pattern, and asked if she minded if I took inspiration from her work. Not only did she not mind, she sent me the pattern draft. Did I mention that she is very gracious? Lovely lady.
I can see this pattern slightly larger, made up in yardage to be turned into a Medieval tunic. I wove yardage recently in my hand spun wool yarn, and sewed it up into a super warm winter tunic. But I wanted something for summer wear too, seeing as I live in Arizona. So I went ahead and ordered dark blue and green yarn in 10/2 mercerized cotton from Webs. I'm eagerly waiting for it to get in!
If I have time in and among other (paying) projects, I'd like to get that worked up in the next few months. I've also got some sewing that I want to get done, and there is a possibility of a large scale scarf order in the works.
I do love staying busy here in the studio!
Friday, August 20, 2010
Tutorial: Warping a standing inkle loom for card weaving
I got my new-to-me standing inkle loom all warped up for card weaving. This was my first time warping this loom, which is always a bit of a problem solving process. But once I got the bugs worked out, it went very well. For the tablets, I'm using the coasters that I altered the other night. (Go back two entries for that tutorial.)
I'm all set ready to weave. Warping and weaving the header took me a bit over an hour and a half.
Labels:
card weaving,
inkle,
loom,
tablet weaving,
tutorial
Wednesday, August 18, 2010
Tutorial: Making card weaving tablets out of restaurant coasters
I picked up a new-to-me standing inkle loom today! I was the lucky bidder in a benefit action. I've been wanting one of these for awhile now, so I can make more than a yard or two of trim at a time. This one should make around 6 yards at a go, which means I will get more weaving time per warping session. This sounds much more efficient to me.
I'll show you the loom in a later post. I'm having camera glitches right now.
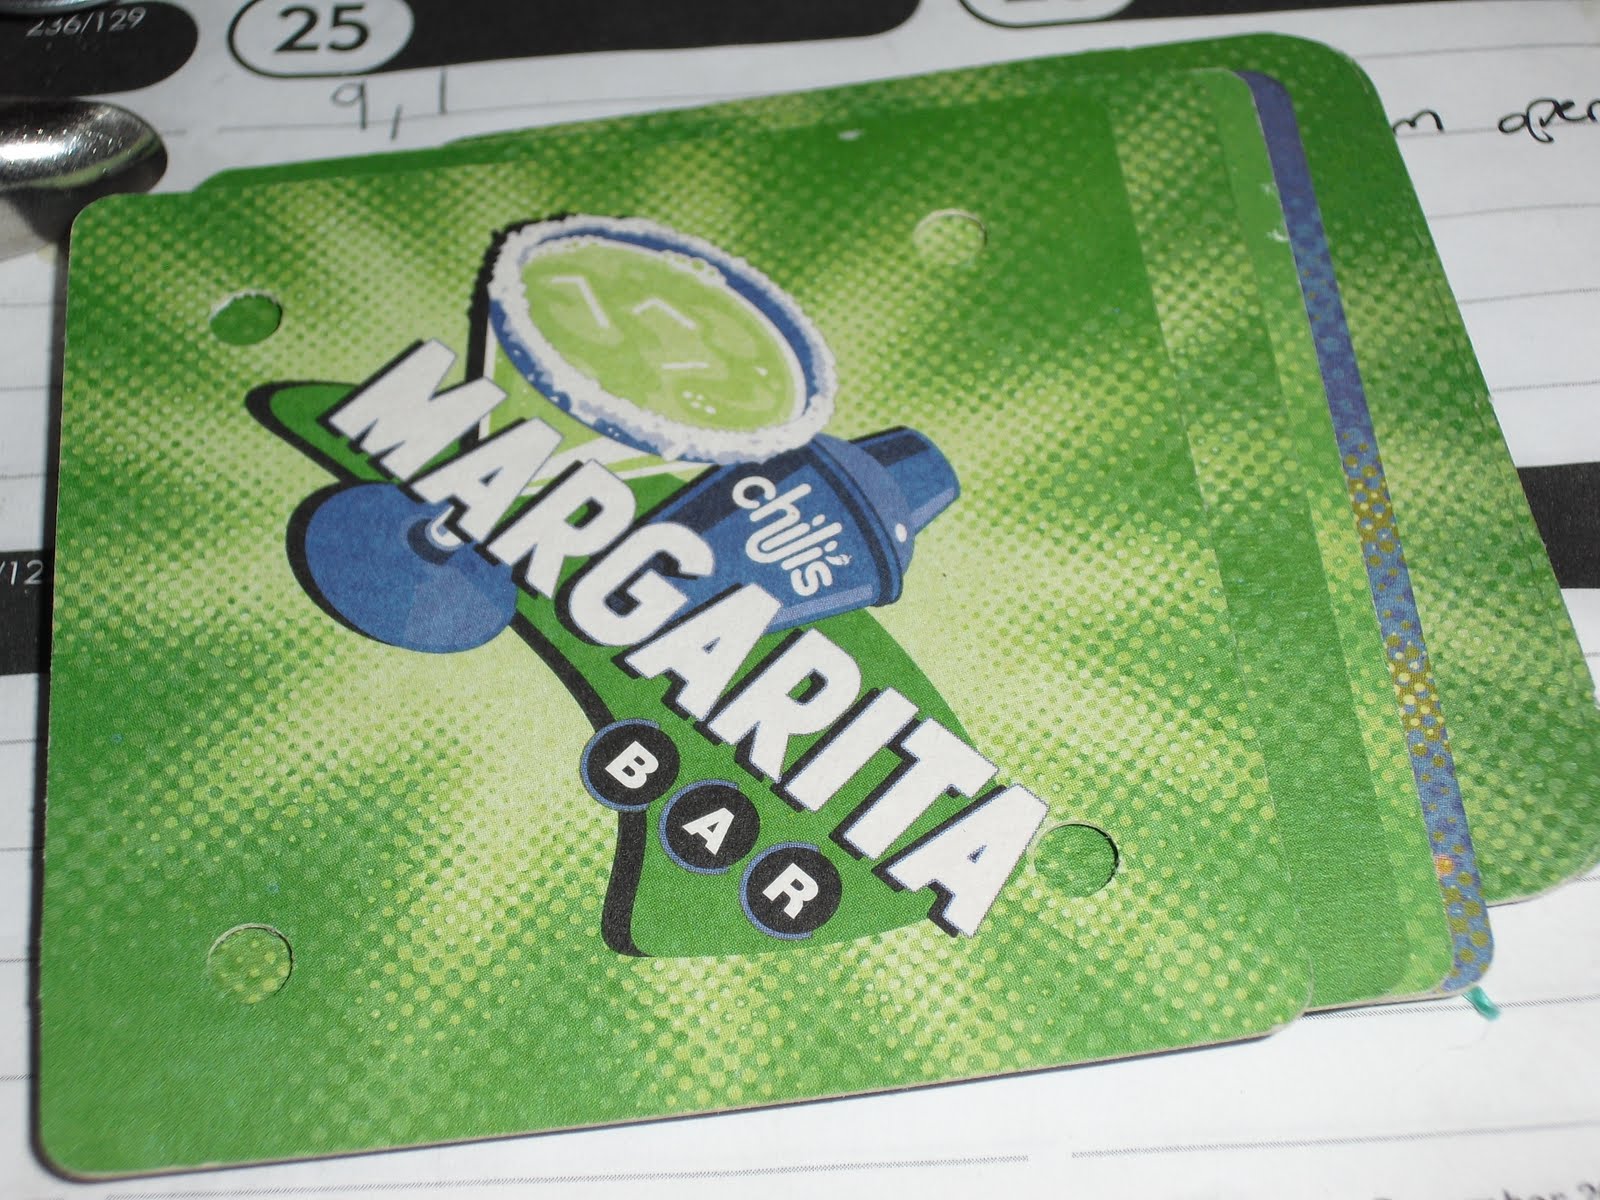
However, I did manage to get these shots earlier this evening. I've found that I prefer tablet weaving to inkle weaving. It is a sturdier fabric, and I get a more even selvage edge. I know part of that is practice, but for a first try on the new loom I wanted to go with my strengths. So I went to grab my cards for tablet weaving...and they weren't in the drawer. They weren't in the other drawer either. Or the bench. Or...Hrmpf. So I decided to improvise. I had a stack of coasters from a Chili's restaurant that were the same size and weight as the professional pack of weaving cards that I had. It was high time to turn them into working weaving tools. Here's what I did:
Materials:
restaurant coasters (These are 3 1/2" square.) (Sweet talk your waiter for a stack.)
3x5 card
pen
markers
hole punch
scissors
First, I traced the corner of the coaster onto a 3x5 card. Anything sturdy enough to keep its shape will do. Paper is a bit flimsy.
The coaster had a rounded corner, so I extended the lines out to give me a good sharp right angle.
Then I cut a bit of the 3x5 card off, and held it up to the corner of the coaster. I eyeballed about how far down and in I wanted my holes to be, and marked that on the card. If you want to be more precise, I think it was about 1/2".
Back to my coaster tracing. Mark that distance down each side, starting from that right angle point.
Using the 3x5 card bottom corner as a straight edge and t-square, extend those lines down at right angles so they cross.
That is your cross hairs. Punch a hole on the cross hairs.
Cut out the 3x5 card along the tracing lines, so it mirrors the shape of the coaster. Match that up to a corner of the coaster.
Using the 3x5 card as your template, punch a hole in the coaster.
Do it again, punching holes in all 4 corners. Now you have one card weaving tablet.
However, you're going to need more than one. I like to have at least 50 on hand. Keep on punching. Yes, your hand might get tired after awhile. (I have heard that it is possible to stack up your pile of cards on a jig, and do this part with a drill press.)
Ok, once you have as many cards as you want, line them all up the same way. Pick a corner to be 'A'. Use a Sharpie (or similar), and mark A B C D clockwise around the corners.
Line up the cards. Using a marker, color one of the edges.
Scooch your chair back, and take a moment to admire the dogs who are sleeping at your feet. (Ok, I admit. That isn't a required step. But I did say that this is what I did, right?)
I like to color each side differently. This helps give me a clue where I am in a pattern repeat when I get going on the weaving.
If you were careful enough with placing your holes, they should all line up perfectly.
Ok, I've got my cards. Now, to figure out yarn and patterns! But that is a job for another day.
(Oh, the pack of cards I couldn't find? I posted about it on FaceBook, and a friend reminded me that she had borrowed them. Oh yeah. I remember that now.)
I'll show you the loom in a later post. I'm having camera glitches right now.
However, I did manage to get these shots earlier this evening. I've found that I prefer tablet weaving to inkle weaving. It is a sturdier fabric, and I get a more even selvage edge. I know part of that is practice, but for a first try on the new loom I wanted to go with my strengths. So I went to grab my cards for tablet weaving...and they weren't in the drawer. They weren't in the other drawer either. Or the bench. Or...Hrmpf. So I decided to improvise. I had a stack of coasters from a Chili's restaurant that were the same size and weight as the professional pack of weaving cards that I had. It was high time to turn them into working weaving tools. Here's what I did:
Materials:
restaurant coasters (These are 3 1/2" square.) (Sweet talk your waiter for a stack.)
3x5 card
pen
markers
hole punch
scissors
Ok, I've got my cards. Now, to figure out yarn and patterns! But that is a job for another day.
(Oh, the pack of cards I couldn't find? I posted about it on FaceBook, and a friend reminded me that she had borrowed them. Oh yeah. I remember that now.)
Friday, October 23, 2009
card weaving: skipped thread technique
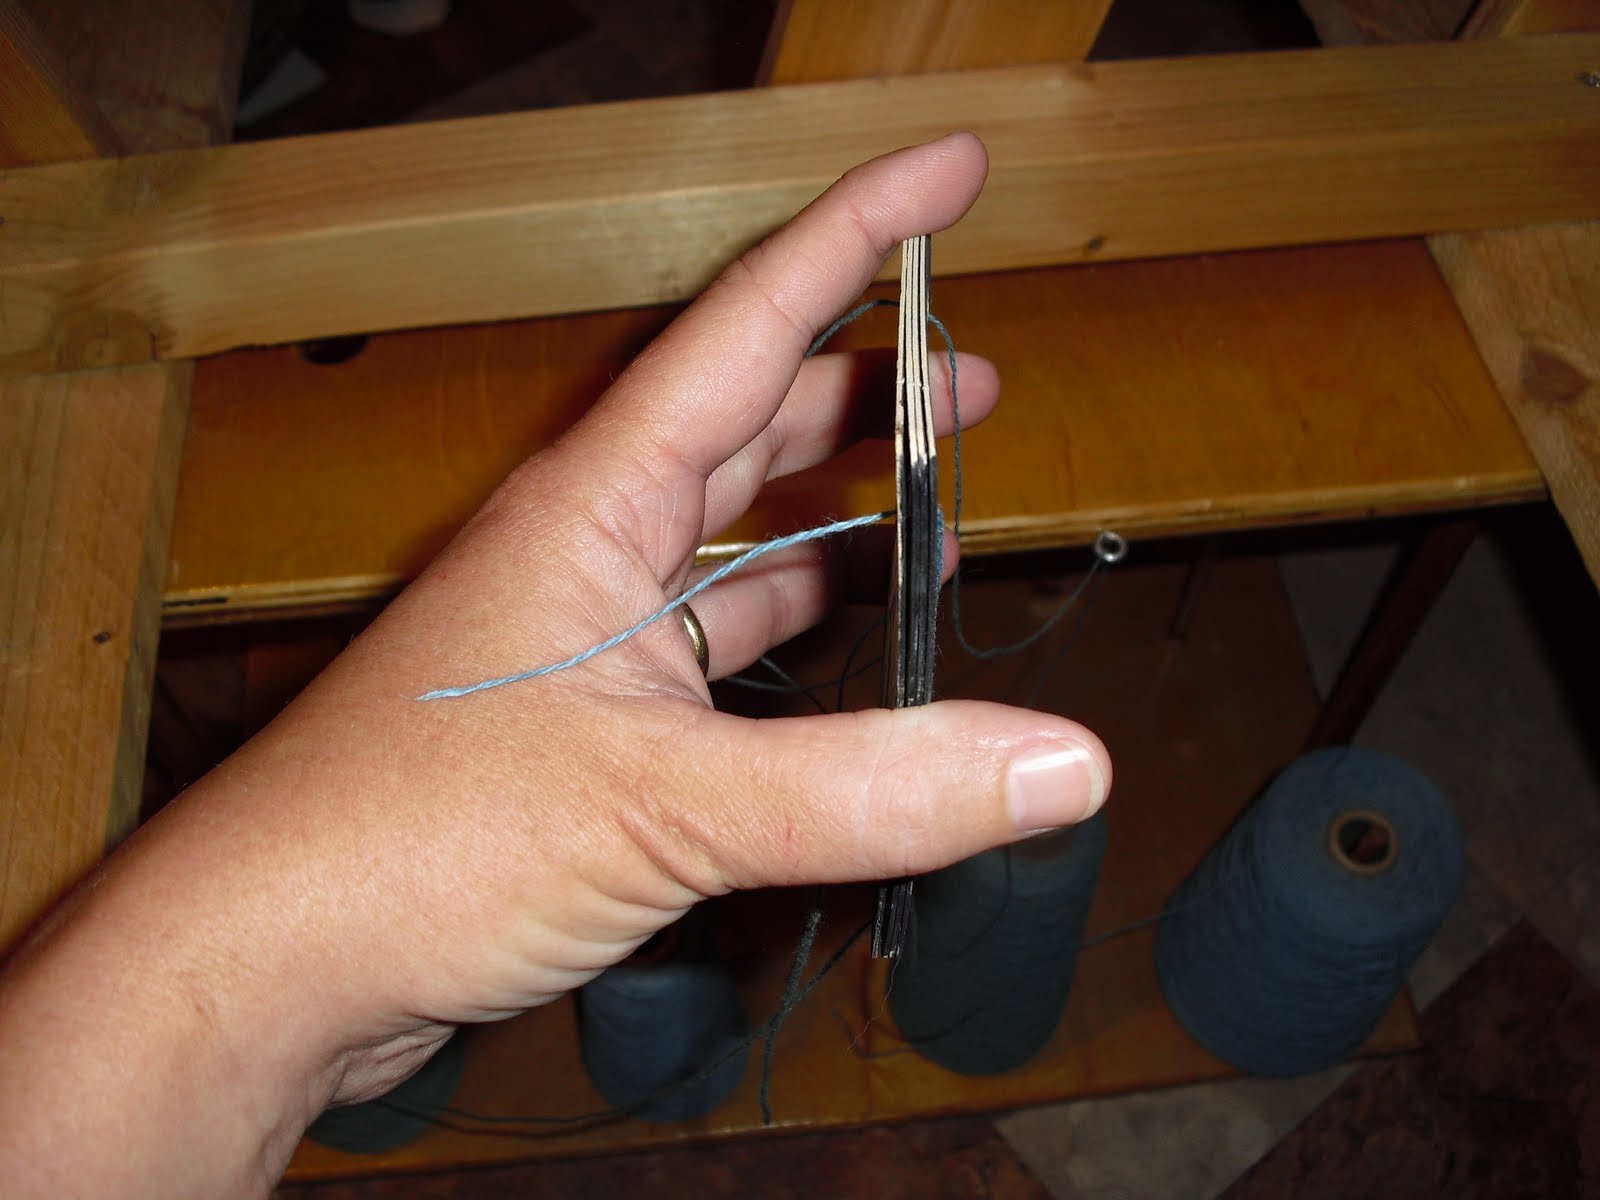
I'm slowly working on the sock machine. Baby steps. In the meanwhile, I've got a band of card woven trim warped up. I put this band on my inkle loom. It is working much much better than the last band I wove, which I tried on a rigid heddle loom. The tension was alllll messed up on that one! In this case, I clamped the inkle loom down on top of my cone holder, and employed binder clips to keep the stacks of cards in order when I was warping. This gave me an even tension with no warp tangles, which is paying off in a consistent weave.

For this band, I'm using #10 crochet cotton, in maroon and light yellow. There are four cards threaded with 4 strands of maroon for the borders. For the interior pattern, I threaded 24 cards with only two threads of yellow. The other two holes were left blank. This is a skipped card technique, that dates back to Viking age. When you are weaving, the weft thread shows through where the warp threads are missing, giving you a 3d effect in the finished band. I'm using maroon for the weft thread.

It makes for a subtly elegant band. I'm thinking it might look spectacular if I used gold and black silk thread, instead of the cotton. Next time I'm over at Fiber Factory, I'll have to see what they have in the way of silk. Road trip!

For this band, I'm using #10 crochet cotton, in maroon and light yellow. There are four cards threaded with 4 strands of maroon for the borders. For the interior pattern, I threaded 24 cards with only two threads of yellow. The other two holes were left blank. This is a skipped card technique, that dates back to Viking age. When you are weaving, the weft thread shows through where the warp threads are missing, giving you a 3d effect in the finished band. I'm using maroon for the weft thread.

It makes for a subtly elegant band. I'm thinking it might look spectacular if I used gold and black silk thread, instead of the cotton. Next time I'm over at Fiber Factory, I'll have to see what they have in the way of silk. Road trip!
Sunday, October 11, 2009
Gourds and weaving and project planning
I've been spending time with family and friends this weekend, and getting some long neglected yard work done. The weather here in Phoenix has finally cooled down enough that we can get back outside, so I spent some time thinning out the bamboo in the back yard. (That gives me two good sized canes that are drying. Wonder what I can do with them...) We need to trim back the grape vines too--they took over the hot tub gazebo over the summer when we weren't looking. Grape vine wreaths, anyone? And the lantana flowers are totally encroaching on the sidewalk, so that will need to be trimmed too. Oh, and the bougainvilla bush is trying to grab people as they come up the walk, so that has get a good chopping too. Hmmm...maybe set up a good compost pile?
Anyway, in and around games and chores, I did manage to get some things done in the studio. I finished up a second Petroglyph Gourd, which will go into the Etsy shop as soon as I get the candle and holder for the inside of it.


Have you ever tried to get to sleep at night, only to have your personal muse come tapping on your brain? That happened to me the other night. I lay there, 2 am in the morning, and ideas kept playing pinball in my skull. One in particular formed fully enough that I had to get up and go write it down so it would just leave me alone.
So, today I went out to the shed and picked out gourds that might fit the vision. I'll work on them next week, and see if I can tease the image into physical form. If I do it right, it will make an awesome looking wall hanging. Stay tuned!

Last week at SCA practice, a friend asked me if I could give them some pointers with card weaving. So this afternoon I warped up a belt in maroon and black, so I will be able to take it with me to practice tomorrow night. This was an experiment for me. I've done quite a bit of card weaving before, but I've always used a backstrap loom to weave on. This time, I decided to put the weaving on a rigid heddle loom that I had lurking around at the back of my supply closet. That took a bit of figuring. So far, I like using the backstrap better. But I'll see how it goes once I get the hang of it.


So far, so good. We'll have to see what calls more tomorrow--the yard outside, or the studio inside. Maybe I'll just take my weaving out to the back yard, and enjoy the sun shine and warm breezes while I create something beautiful. Now, that sounds like a good plan!
Anyway, in and around games and chores, I did manage to get some things done in the studio. I finished up a second Petroglyph Gourd, which will go into the Etsy shop as soon as I get the candle and holder for the inside of it.
Have you ever tried to get to sleep at night, only to have your personal muse come tapping on your brain? That happened to me the other night. I lay there, 2 am in the morning, and ideas kept playing pinball in my skull. One in particular formed fully enough that I had to get up and go write it down so it would just leave me alone.
So, today I went out to the shed and picked out gourds that might fit the vision. I'll work on them next week, and see if I can tease the image into physical form. If I do it right, it will make an awesome looking wall hanging. Stay tuned!
Last week at SCA practice, a friend asked me if I could give them some pointers with card weaving. So this afternoon I warped up a belt in maroon and black, so I will be able to take it with me to practice tomorrow night. This was an experiment for me. I've done quite a bit of card weaving before, but I've always used a backstrap loom to weave on. This time, I decided to put the weaving on a rigid heddle loom that I had lurking around at the back of my supply closet. That took a bit of figuring. So far, I like using the backstrap better. But I'll see how it goes once I get the hang of it.
So far, so good. We'll have to see what calls more tomorrow--the yard outside, or the studio inside. Maybe I'll just take my weaving out to the back yard, and enjoy the sun shine and warm breezes while I create something beautiful. Now, that sounds like a good plan!
Subscribe to:
Posts (Atom)